If you have basic knowledge of automating web application tests through your browser, then this blog post is for you. We will be demonstrating how to use Selenium in a docker container, which makes it faster for you to get started.
First things first:

What is Selenium?
Selenium automates browsers :) What that means is that Selenium is a framework that allows you to automatically test web applications across various browsers (Chrome, Firefox, …) and platforms (Windows, Mac, Linux). Selenium allows the testers to write tests in various programming languages like Java, PHP, C#, Python, Groovy, Ruby, and Perl.
What is Docker?
Docker containers wrap up a piece of software in a complete filesystem that contains everything it needs to run: code, runtime, system tools, system libraries – anything you can install on a server. This guarantees that it will always run the same, regardless of the environment it is running in (from wikipedia).
What is Browser Testing?
Known by many names, including end to end testing and user experience testing, browser testing is a form of testing to ensure that a web-application works as expected in a given browser.
Why use Docker together with Selenium?
If you use Selenium, then you don’t need to have the browser installed in your local environment. For example if you don’t want to install Chrome, then you can use docker for that.
Another great use case for docker is when you need to setup the CI system (CI stands for Continuous Integration, e.g. Jenkins) you don’t need to install the browsers, the drivers and so on, you just need configure and install Docker.
You can even create docker images with specific browser profiles (including browser plugins etc) and with specific browser versions.
Tutorial
Ok, lets see some code. We will automate the testing of a simple web page, to show how it works with Selenium in docker. After that you are ready to go crazy with your own application :)
Test Scenario

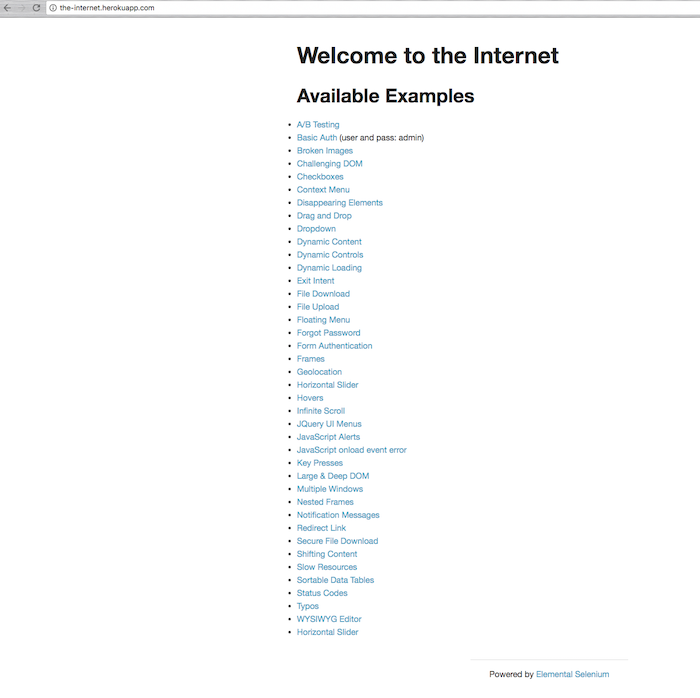
We will automate the page the-internet.herokuapp.com. Our test scenario looks like this:
- open the main page of the-internet.herokuapp.com
- check that the title is “The Internet”
- click on the checkbox link
- check if the last checkbox is checked
- generate a screenshot for each page we navigate (main page and checkbox page)
Setup
What do you need in order to write and run Selenium tests?
- Have ruby installed (Mac instructions, Linux instructions)
- Have Docker installed (instructions)
Install the following gems: “selenium-webdriver” and “rspec”
To install the gems follow these steps:
$ sudo gem install selenium-webdriver rspecOr install via bundler. The code is available on github and you need to run the following command:
$ bundle install
Writing a Test
Now after all the setup, let’s create our first test. Here is the ruby script that implements the test scenario that we explained above.
We will not go into further detail about how these Selenium tests work. If you want to write your own tests, we recommend that you start by reading Elemental Selenium.
# filename: simple_example.rb

require 'selenium-webdriver'
require 'rspec/expectations'
include RSpec::Matchers

def setup
  caps = Selenium::WebDriver::Remote::Capabilities.send("chrome")
  @driver = Selenium::WebDriver.for(:remote, url: "http://0.0.0.0:4444/wd/hub", desired_capabilities: caps)
  @driver.manage.window.size = Selenium::WebDriver::Dimension.new(1920, 1080)
end

def teardown
  @driver.quit
end

def run
  setup
  yield
  teardown
end

run do
  # Open the main page and check for the title
  @driver.get 'http://the-internet.herokuapp.com/'
  expect(@driver.title).to eql 'The Internet'

  # Generate a screenshot of the main page
  @driver.save_screenshot(File.join(Dir.pwd, "selium-docker-main-page.png"))

  # Open the chebox page and check if the last checkbox is "checked"
  @driver.get 'http://the-internet.herokuapp.com/checkboxes'
  checkboxes = @driver.find_elements(css: 'input[type="checkbox"]')
  expect(checkboxes.last.selected?).to eql true

  # Generate a screenshot of the checkbox page
  @driver.save_screenshot(File.join(Dir.pwd, "selium-docker-checkbox-page.png"))
end
To run the Docker Selenium image you need to execute the following command in your shell. The first time you execute this command it will download the image from the docker website and then stores the docker images locally.
$ docker run -d -p 4444:4444 selenium/standalone-chrome

Unable to find image 'selenium/standalone-chrome:latest' locally
latest: Pulling from selenium/standalone-chrome

6bbedd9b76a4: Already exists
fc19d60a83f1: Already exists
de413bb911fd: Already exists
2879a7ad3144: Already exists
668604fde02e: Already exists
6f937cfc60a5: Pull complete
318afcd73c12: Pull complete
8632a4eb4160: Pull complete
6faf0ee13b93: Pull complete
af860db8814e: Pull complete
524e8cc30d75: Pull complete
1e484774c0d6: Pull complete
6621c8b8af82: Pull complete
15de8915984e: Pull complete
448af82067d8: Pull complete
2c2559c84fcd: Pull complete
8f5d44e05621: Pull complete
a46861b4770e: Pull complete
991dc76774b8: Pull complete
7a7072696721: Pull complete
ea06d0a111b5: Pull complete
Digest: sha256:ebef6c30175e81f4d528749a4d60f00c98d9aeb9423e1dfaf2f36ca4045526d2
Status: Downloaded newer image for selenium/standalone-chrome:latest
1f2a54937a8f5a52d6a250c76fc6d072ca1f688629bc520a59c357365b93b226
Running your Test
After that you run your test (ruby script) like this:
$ ruby simple_example.rb
You should not see any error on the command line and if you run ls you will see the screenshot files that were created:
$ ls *.png
selenium-docker-checkbox-page.png selenium-docker-main-page.png
This simple script checks if the title of the website matches “The Internet” and if the last checkbox is checked on the checkbox example page. In each page we took a screenshot, just to demonstrate that we are really running it in the browser (because when you run this docker container you can’t see the browser).
If you need to debug your script and see what is happening in the browser you will need to use another docker image which contains a VNC server enabled, which allow you to make a remote connection and “see” the browser and then you can interact with. The docker image is: “selenium/standalone-chrome-debug” for Chrome and for Firefox “selenium/standalone-firefox-debug”. For more information about how to access the VNC you can check this site.
Happy testing and a German “Tschüss” :)
PS: If you want to know more about Meltwater you can check out our about page, browse our open source projects, and most importantly learn more about our job offerings around the world.